Just another – just for fun stuff 🙂 Maybe useful to some web devs out there [ just get the codes if u like it 🙂 ] see Dancing DIVs – or any HTML container 🙂
Dancing Divs – Playing with HTML & Javascript
Reply

Just another – just for fun stuff 🙂 Maybe useful to some web devs out there [ just get the codes if u like it 🙂 ] see Dancing DIVs – or any HTML container 🙂

3d sculpturing
Project 3D: Sculpturing a base mesh “mold/stencil” for a product “Rattle Stick” -an American “Deer Hunters” newest/upcoming tool 🙂
3D sculpting is really an intensive task to do, it requires “keenest” eyes & a tons of “brains” for problem solving. Imagine an IGS Nurbs from SOLIDWORKS to a high poly mesh 3D model, eats up tons of CPU/GPU/Memory to accomplished.
And also sleepless nights 🙂
Tools: 3D Max, Maya, Blender, Mudbox, Sculptris & many more 🙂
My continuation to my previous tutorial 3d interactive in less than 5 minutes
Let’s now texture the 3d cube:
Open Blender3d (version 2.25)

Split the screen in two, for better viewing – move your mouse into the “dividers”, and observe the cursor will change its appearance, right-click on it. select “split” . Continue reading
November 30 – December 1, 2012
Topics:
> Web – Development, Trends & Issues
> 3D interactive interface development
> Workshop: Creation of St. Tonis College Inc. 3D virtual tour that will be interfaced to http://3dxploration.com/ soon (once completed)
It was a great experience providing & sharing tools for productivity to students & faculty of the College. Also, meeting people with a Good Samaritan behavior (Sir Efren Danag – i salute to you – for your hands on accommodation). The only thing that’s HECK is the LONG TRAVEL (almost 12-14 hours travel time – %^%&^$&%$) due to too many road crushed – i mean re-constructions.
 To all fans of Torque3D, Garagegames recently announced they are moving forward to Open Source MIT license.
Torque 3d is one of the best 3d game engine.
“The Torque community is now home to 150,000+ game developers and artists with additional licensees of more than 200 universities and schools for computer science and game design curricula.
Torque is a constantly evolving technology built for speed and ease of use. We reinvest in Torque aggressively with 40+ experienced developers working on the technology. Available on the PC, Mac, iPhone, web, and more, Torque stays up to date on relevant platforms and ahead of the curve in performance. Torque’s licensees include scrappy innovators and industry giants alike, as you can see below.
Torque provides dedicated personnel for custom support on Torque projects. With some of the best developers in the industry at your back, your project is assured to come together on time and a success. ” – quoted from garagegames.com
So what are you waiting for download now!!!
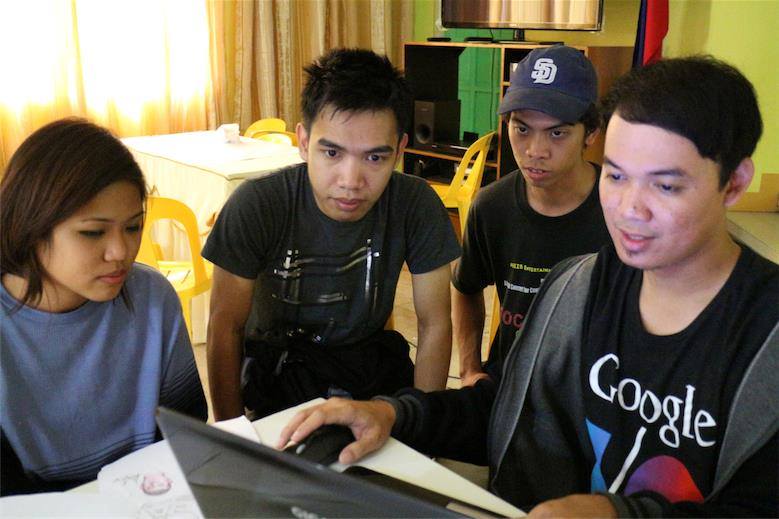
Photos from the event 🙂
Will post the topics & detailed presentation later 🙂

see more photos >>> Continue reading
DNS (Domain Name System) is an Internet service that converts user-friendly domain names into the numerical Internet protocol (IP) addresses that computers use to talk to each other. When you enter a domain name, such as www.fbi.gov, in your web browser address bar, your computer contacts DNS servers to determine the IP address for the website. Your computer then uses this IP address to locate and connect to the website. DNS servers are operated by your Internet service provider (ISP) and are included in your computer’s network configuration. DNS and DNS Servers are a critical component of your computer’s operating environment—without them, you would not be able to access websites, send e-mail, or use any other Internet services. Continue reading
Once again yours truly is again cordially invited as Resource Speaker (with team artsdigitalmedia.com ofcourse 🙂 for a Training Computer Literacy (Topics: Tips & Tricks: Amazingly faster computer, Understanding how computer works & its operation, Program & files protection, Internet and System Integration, Inter-connectivity and inter-operability, and Web design & development) – July 12-13, 2012 San Jose City Hall (City Hall Staff & Officials will be the participants)
3d interactive 101 : Make a 3d interactive in less than 5 minutes
Introducing Blender 3d – its a free 3d modeling software with built-in game engine.
download it at www.blender.org/download/get-blender/ try getting the oldest version for our tutorial (new ones are great but we wont need too much for now, just the basic. In this tutorial i only use version 2.25 so try downloading the same version) – why the old version? well, you don’t need an army to defeat an easy enemy – gamers thought 🙂
install it on your machine, make sure you downloaded the right installer for your operating system.
open the application – you will see gray interface with many thin lines like the photo below:
![artpologabriel001 [1024x768]](https://artpologabriel.com/wp-content/uploads/2012/06/artpologabriel001-1024x768.jpg)
![artpologabriel002 [1024x768]](https://artpologabriel.com/wp-content/uploads/2012/06/artpologabriel002-1024x768.jpg)
go to “camera view” – see “menu – view” at the top
![artpologabriel003 [1024x768]](https://artpologabriel.com/wp-content/uploads/2012/06/artpologabriel003-1024x768.jpg) right-click the vertical thin black line – (see photo below), and hit G key to grab it (its the camera), then drag it a bit upward to see the grid lines (default floor), then right-click to end the dragging & position it.
right-click the vertical thin black line – (see photo below), and hit G key to grab it (its the camera), then drag it a bit upward to see the grid lines (default floor), then right-click to end the dragging & position it.
![artpologabriel004 [1024x768]](https://artpologabriel.com/wp-content/uploads/2012/06/artpologabriel004-1024x768.jpg)
Now you will see a tiny flat square lying on the floor, you may want to scale it, right-click to select then hit S & drag to scale it. ![artpologabriel005 [1024x768]](https://artpologabriel.com/wp-content/uploads/2012/06/artpologabriel005-1024x768.jpg) Scaled
Scaled ![artpologabriel006 [1024x768]](https://artpologabriel.com/wp-content/uploads/2012/06/artpologabriel006-1024x768.jpg)
hit Space – you will see a pop up menu, click add – Mesh – Cube
![artpologabriel007 [1024x768]](https://artpologabriel.com/wp-content/uploads/2012/06/artpologabriel007-1024x768.jpg)
![artpologabriel008 [1024x768]](https://artpologabriel.com/wp-content/uploads/2012/06/artpologabriel008-1024x768.jpg)
![artpologabriel009 [1024x768]](https://artpologabriel.com/wp-content/uploads/2012/06/artpologabriel009-1024x768.jpg)
![artpologabriel010 [1024x768]](https://artpologabriel.com/wp-content/uploads/2012/06/artpologabriel010-1024x768.jpg)
![artpologabriel011 [1024x768]](https://artpologabriel.com/wp-content/uploads/2012/06/artpologabriel011-1024x768.jpg)
![artpologabriel012 [1024x768]](https://artpologabriel.com/wp-content/uploads/2012/06/artpologabriel012-1024x768.jpg)
![artpologabriel013 [1024x768]](https://artpologabriel.com/wp-content/uploads/2012/06/artpologabriel013-1024x768.jpg)
![artpologabriel014 [1024x768]](https://artpologabriel.com/wp-content/uploads/2012/06/artpologabriel014-1024x768.jpg)
![artpologabriel015 [1024x768]](https://artpologabriel.com/wp-content/uploads/2012/06/artpologabriel015-1024x768.jpg)
![artpologabriel016 [1024x768]](https://artpologabriel.com/wp-content/uploads/2012/06/artpologabriel016-1024x768.jpg)
![artpologabriel017 [1024x768]](https://artpologabriel.com/wp-content/uploads/2012/06/artpologabriel017-1024x768.jpg)
![artpologabriel018 [1024x768]](https://artpologabriel.com/wp-content/uploads/2012/06/artpologabriel018-1024x768.jpg)
![artpologabriel019 [1024x768]](https://artpologabriel.com/wp-content/uploads/2012/06/artpologabriel019-1024x768.jpg)
![artpologabriel020 [1024x768]](https://artpologabriel.com/wp-content/uploads/2012/06/artpologabriel020-1024x768.jpg)


click on the realtime button, make sure the cube is selected (its pink when selected)

add a sensor, just click it.. later we will adjust some option

then a controller, just click it again..

then an actuators, yes just click it..

connect the sensor to controller, by click & dragging the small gold icons to each other


add some parameters, find the dRot shift right click on the first column then put some numeric value, lets make it .01 value. this is actually adding local rotation X – to the cube (remember X Y Z axis? will explain it on my other tutorials later).

Back to the sensor – leftclick the button that says “always” and select “keyboard” – yes you just give it a user interactive option.

on the button labeled “key” – hit it then choose any keyboard key, i used SPACE for this tutorial


Let’s simulate it or let me say – run it on game engine, yes i said that this blender3d has a builtin game engine – awesome right 🙂 hit START GAME and voila – nothing happens 🙁

try hitting the SPACE key.. and if you followed the instructions the cube will rotate, everytime you hit SPACE on your keyboard.
Next, is.. play around with different value of actuators then try using other sensors’s options.. try adding other MESH objects like sphere, tube, etc..
NO PHOTOS – See this link
I will post other tutorials, shading the interactive interface, adding textures & materials, gravity, physics etc..
This is my tutorial in making basic & simple HTML/CSS Menu that shows & hide SubMenus on Mouse Over. There are many other tutorials out there that maybe be better but quite complicated and heavy for beginners.
here it goes:
Create a style tag for your menu, dont forget the html/head/body tags – remember to put your stylesheet inside head tag.
<style>
.menu{}
</style>
Leave it without any parameters/option for now (later do as u wanted 🙂
next, add the menu list
.menu li{}
if you want horizontal menu use float:left on list tags <li> else the default appearance will be vertical menu. then add your other style of your liking such as width, height, background-color/images, etc. (later recommended)
.menu li{ float:left}
next will be your submenu, hide it using display:none (or visibility: hidden for CSS3)
.menu ul{display:none}
Remember your main menu is at <li> tags and it holds your submenus at <ul> tags
<li>menu
<ul>submenu</ul>
<ul>submenu2</ul>
</li>
Now here comes the magic that will reveal the submenu when the mouse is located over the menu (hovering they say)
add the following to your style
.menu li:hover ul{display: block;}
then again, add your other style of your liking such as width, height, background-color/images, etc.
see it live at http://artpologabriel.com/wp-content/uploads/2012/06/1.html
test it – submenu will be in – now u see now u don’t – state 🙂
Final code:
<html>
<head>
<style>
.menu{
float:left;
}
.menu li{
float:left;
display: block;
width: 200px;
height; 50px;
}
.menu ul{
display: none;
}
.menu li:hover ul{
display: block;
background-color: blue;
}
</style>
</head>
<body>
<div>
<li>home
<ul>home 1</ul>
<ul>home 2</ul>
</li>
<li>about
<ul>bout</ul>
<ul>bout2</ul>
</li>
<li>contact
<ul>contact1</ul>
<ul>contact2</ul>
</li>
</div>
</body>
</html>